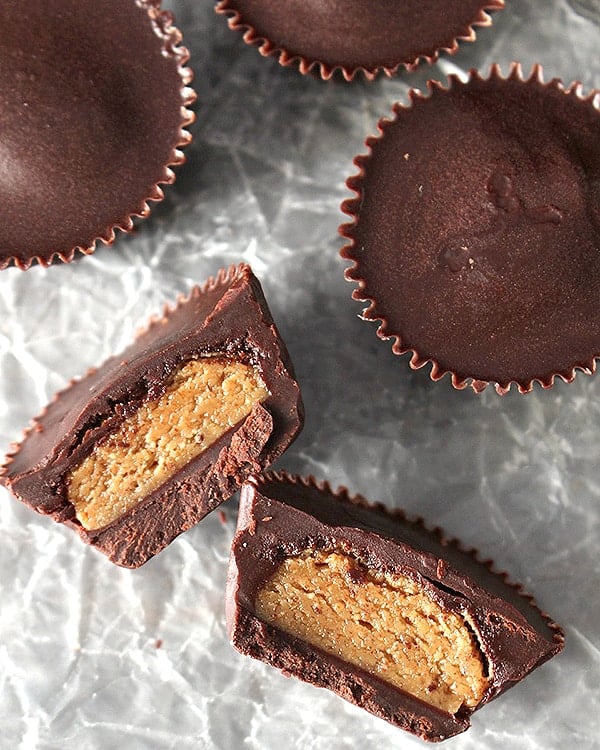
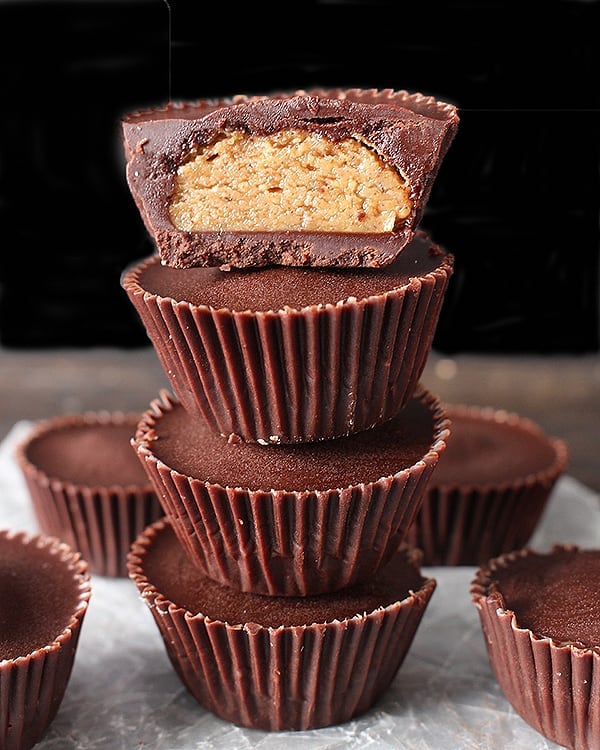
These Paleo Almond Butter Cups are easy, have only 5 ingredients, and are a healthy version of the popular candy. Gluten free, dairy free, vegan, and addictively good!

Peanut Butter cups are so popular and making your own is easier than you may think! You most likely have all the ingredients already and it only takes a few minutes. They do have to chill in the fridge in-between steps, but there is nothing difficult or tricky about them.
Alternative fillings
Using almond butter for the inside makes these paleo, and you can even use sunflower seed butter to make them nut free. Of course using peanut butter is classic and how I make them often. Really any nut butter can be used and would be delicious.

Homemade chocolate
The homemade chocolate is so easy to make and naturally sweetened. The directions say 2-3 tablespoons because that is kind of personal preference. I made a batch for my dad and I used 3 tablespoons because I know he likes things a little sweeter, but the batch I made for myself I only used 2 tablespoons and they came out more like dark chocolate which is what I prefer. If you want them like the store bought kind then use 3 tablespoons.
Storing homemade cups
These are best stored in the fridge because of the coconut oil – it has a melting point of about 77° so they will get soft if left out. They can be stored in the freezer as well.
Whether you fill them with almond butter or peanut butter, they are delicious! They are the perfect ratio of chocolate to nut butter and they are melt-in-your-mouth good! Here are some more candy recipes to try:
- Butterfinger Candy Bars (paleo and vegan)
- Paleo Mounds Candy Bars
- Chocolate Pretzel Toffee (gluten free and vegan)
- Pecan Turtles (paleo and vegan)
Hungry for more? Subscribe to my newsletter and follow along on Facebook, Pinterest and Instagram for all of the latest updates.
Almond Butter Cups
Ingredients
Chocolate
- ½ cup coconut oil
- ½ cup cacao powder
- 2-3 tablespoons maple syrup
- ½ teaspoon salt
Almond Butter Filling
- ⅓ cup almond butter
- 1 tablespoon maple syrup
Instructions
- Line 12 mini muffin tins with liners- parchment works the best.
- In a large sauce pan, combine coconut oil, cacao powder, maple syrup, and salt. Heat over medium heat and whisk until fully combined. As soon as it starts to boil, turn off the heat. Spoon about 1 tablespoon into each liner. Once they all have some chocolate in them, tilt the pan gently in a circle to get the chocolate to go up the sides a little. Leave the remaining chocolate in the pan for the top. Place in the fridge for 10-15 minutes- until they are fully hard.
- While they are chilling, make the filling. In a small bowl, combine nut butter and the maple syrup. Stir until well mixed. Remove the chocolate from the fridge and fill each one with a little of the nut butter mixture until all the mixture is used. Spoon the rest of the chocolate over the nut butter, making sure to completely cover it. *If the chocolate mixture has hardened, turn the heat on low until it’s smooth again.
- Place cups back in the fridge and let them chill for 20 minutes, or until they are completely hard. To easily remove cups, run a butter knife around the edges then peel off the liner. Store in the fridge or freezer.

Jenna Borrelli says
These turned out better than I expected! Super easy to make. I used a silicone mold and they popped out real nicely. Also used crunchy peanut butter and a dash of baking soda to make the filling fluffy. Will def make these again!
Jessica DeMay says
Thanks for making them and for the great review 🙂
Gaby Colon says
Worked great!
Jessica DeMay says
Great! Thanks for trying them, Gaby!
Robin says
Not sure what happened on my measurements, but the chocolate was too strong. The cocoa power I used stated that it was cacao powder...hoping that was correct. I will try less powder next time and maybe add a tiny bit more maple syrup.
Becky says
I just made these with a pinch of baking soda in the filling. I really like how light and airy it made the filling.
These are so fun to make and eat for a 'picker-upper". I popped mine in the freezer for 18 minutes while I did some kitchen clean-up, then ate one as a treat. So yummy!
Jessica DeMay says
Thanks for trying them, Becky! What a great tip about the baking soda- thanks for sharing! I'm glad you like them 🙂
Jessica M says
I had a problem with the maple syrup separating from the bottom chocolate layer.
Jessica DeMay says
Hi Jessica- I'm sorry about that! Did you mix it really well? I haven't has that happen. I hope it still tasted okay.
Jessica M says
They were still delicious, just a little sweet and gooey on the bottom!
Rebeccca says
To make this recipe keto friendly could you substitute swerve for the maple syrup?
If so, how much swerve/ 1/3 c almond butter?
Jessica DeMay says
Hi Rebecca- yes, that would work great! You can taste as you go. I wrote 1 tablespoon for the filling, but if you want it sweeter go ahead and add more. I hope you try them!
Kat says
Oh my goodness.... these are awesome!!! This easy recipe got lots of oohs and ahs!! Love them! Thanks!
Jessica DeMay says
You're welcome, Kat! Thanks for trying my recipe!
Tami says
These are delicious!! Add all the maple syrup especially if there are kids at home. Just 2 tablespoons had the dark chocolate taste. The kids love the 3 TBSP. I have a daughter who can't eat gluten, dairy or milk. AMAZING!! Thanks
Jessica DeMay says
You're welcome, Tami! You are right, kids like it sweeter. I'm so glad everyone enjoyed them 🙂
Delfina says
YES! I have such a soft spot for the chocolate and nut combination. These look divine!
Jessica DeMay says
Thanks, Delfina!
Mary Ann | The Beach House Kitchen says
OMG! Now these are amazing Jessica! Your photos are making me wish I could grab that stack right off the screen! Cannot wait to try!! Thanks for sharing!
Jessica DeMay says
Thanks, Mary Ann! We love them 🙂